Author: chris

  • One-Pan Meal Prep Recipes That Actually Taste Good Reheated

    Meal prepping shouldn’t mean eating sad, soggy leftovers by Wednesday. The secret to actually enjoying your prepared meals lies in choosing the right cooking method and ingredients that improve with time. One pan recipes solve two problems at once: minimal cleanup and built-in flavor development that makes reheating a win instead of a compromise.

    Key Takeaway

    One pan meal prep recipes work best when you combine proteins with moisture-rich vegetables and starchy bases that absorb flavor over time. Focus on sheet pan roasting or skillet braising methods, avoid crispy textures that don’t reheat well, and always undercook by 10% since reheating finishes the cooking process. Store components separately when texture matters, together when saucy dishes benefit from marinating.

    Why One Pan Cooking Changes Everything for Meal Prep

    Traditional meal prep often requires juggling multiple pots, pans, and baking sheets. You end up with a mountain of dishes before you’ve even portioned anything into containers.

    One pan methods streamline the entire process.

    Everything cooks together, which means flavors meld naturally. The chicken drippings season the vegetables. The spices coat everything evenly. The starches absorb the rendered fats and juices.

    This isn’t just about convenience. It’s about creating meals where every component tastes connected.

    The other advantage? Temperature management becomes simpler. You’re not trying to time three different cooking methods to finish simultaneously. Set your oven to 400°F or heat one skillet, and you’re managing a single heat source.

    For busy professionals coming home after a long day, this matters. You can prep on Sunday without feeling like you’ve worked a restaurant shift.

    The Science Behind Recipes That Taste Better Reheated

    Some foods genuinely improve after sitting for 24 hours. Curries, stews, and braised dishes are classic examples.

    The reason comes down to chemical reactions that continue after cooking stops.

    Starches continue absorbing liquid. Spices penetrate deeper into proteins. Acids break down tough fibers in meat and vegetables.

    When you build one pan meals with this principle in mind, you’re essentially creating dishes designed to peak on day three instead of day one.

    Here’s what works:

    • Braised proteins in sauce (chicken thighs, pork shoulder, beef chunks)
    • Grain-based dishes that soak up flavor (rice, farro, quinoa)
    • Roasted root vegetables with caramelized edges
    • Bean and legume dishes that develop creamier textures
    • Tomato-based sauces that mellow and deepen

    Here’s what doesn’t:

    • Crispy textures (they turn soggy)
    • Delicate fish (becomes dry and flaky)
    • Fresh herbs added before storage (they oxidize and turn brown)
    • Cream sauces without stabilizers (they separate)
    • Anything relying on textural contrast

    The Formula for Foolproof One Pan Meal Prep

    Every successful meal prep recipe follows a basic structure. Once you understand the formula, you can create infinite variations.

    Start with a protein that has enough fat to stay moist. Chicken thighs beat chicken breasts every time. Salmon works better than tilapia. Pork shoulder trumps pork tenderloin.

    Add a starchy base that absorbs liquid. Rice, potatoes, sweet potatoes, and winter squash all excel here. They soak up the rendered fat and seasoning, becoming more flavorful with time.

    Include vegetables that roast well without turning mushy. Bell peppers, broccoli, cauliflower, Brussels sprouts, and green beans hold their structure. Zucchini and mushrooms work if you cut them large and don’t overcook.

    Build in moisture through one of these methods:

    1. A braising liquid (broth, wine, coconut milk)
    2. A sauce base (tomato, curry, teriyaki)
    3. Natural juices from the protein and vegetables

    Season aggressively. Flavors mute when food is chilled and reheated. What tastes perfectly seasoned fresh will taste bland after refrigeration.

    Add 20% more salt, spices, and aromatics than you think you need.

    Sheet Pan Roasting: The Most Versatile Method

    Sheet pan dinners dominate meal prep blogs for good reason. They’re nearly impossible to mess up.

    The technique is straightforward:

    1. Preheat your oven to 400°F to 425°F
    2. Toss everything with oil, salt, and spices
    3. Spread in a single layer without crowding
    4. Roast for 25 to 35 minutes, stirring halfway

    The key is matching cooking times. Dense vegetables like potatoes need a head start. Quick-cooking items like shrimp go in during the last 10 minutes.

    Here’s a timing chart:

    Ingredient Cooking Time Size Guide
    Chicken thighs 35-40 min Bone-in, skin-on
    Chicken breasts 25-30 min 6 oz portions
    Salmon 12-15 min 1-inch thick
    Potatoes 35-40 min 1-inch cubes
    Sweet potatoes 30-35 min 1-inch cubes
    Brussels sprouts 25-30 min Halved
    Broccoli 20-25 min Large florets
    Bell peppers 25-30 min 1-inch strips

    For meal prep success, pull everything from the oven when it’s about 90% done. The reheating process will finish cooking and prevent dry, overcooked results.

    Skillet Braising for Maximum Flavor

    Braised dishes are meal prep gold. They actually improve over several days as flavors continue developing.

    The method works on the stovetop or in the oven. Either way, you’re cooking protein in liquid at moderate heat until tender.

    Start by searing your protein in a hot skillet with a small amount of oil. This creates fond (those brown bits stuck to the pan) that becomes the flavor foundation.

    Remove the protein and sauté aromatics. Onions, garlic, ginger, or shallots work depending on your cuisine direction.

    Deglaze the pan with liquid. Wine, broth, coconut milk, or even water lifts those flavorful bits and incorporates them into your sauce.

    Return the protein to the pan along with vegetables and starches. Cover and simmer until everything is tender.

    The beauty of this method? It’s self-saucing. The liquid reduces and thickens, coating every component with concentrated flavor.

    When braising for meal prep, always err on the side of more liquid than you think you need. Some will evaporate during storage and reheating. A dish that seems slightly soupy on day one will have perfect consistency by day three.

    Building Balanced Macros Into Every Pan

    Meal prep often serves fitness goals. You’re not just saving time but hitting protein targets and managing calories.

    One pan recipes make macro balancing straightforward because you control every ingredient.

    For a high-protein, moderate-carb meal:

    • 6 oz protein (chicken, fish, lean beef)
    • 1 cup starchy vegetable or grain
    • 2 cups non-starchy vegetables
    • 1 tablespoon healthy fat

    This typically lands around 400 to 500 calories with 35 to 45 grams of protein.

    Adjust based on your needs. Athletes might double the protein and carbs. Someone cutting weight might reduce the starch and increase vegetables.

    The advantage of one pan cooking? You can easily prep multiple macro profiles simultaneously using the same method.

    Make one sheet pan with chicken thighs and sweet potatoes for higher calories. Make another with white fish and cauliflower for lighter meals. Same technique, different outcomes.

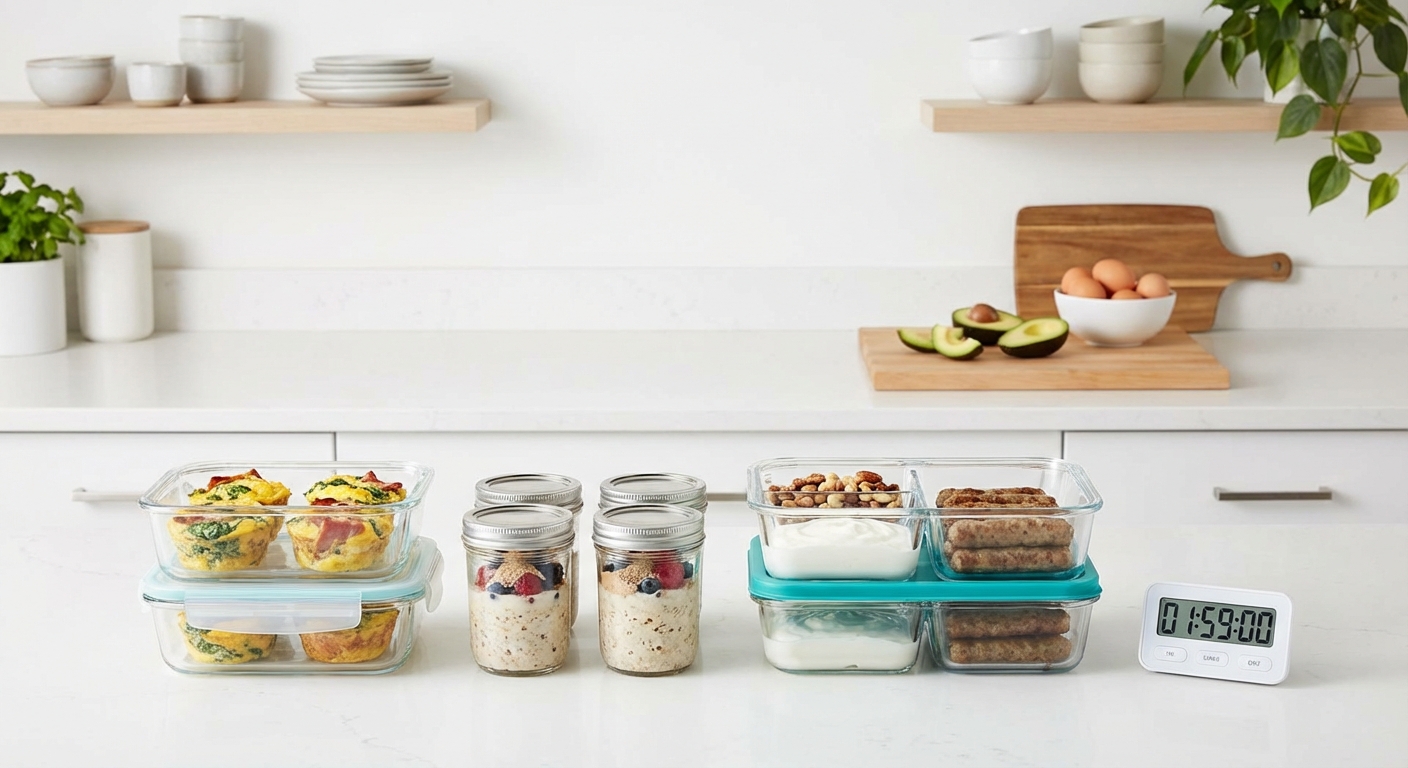
    Storage Strategies That Preserve Quality

    How you store meal prep matters as much as how you cook it.

    Glass containers beat plastic for reheating. They don’t absorb odors, can go straight from fridge to oven, and don’t leach chemicals when heated.

    Portion into individual servings immediately after cooking. Waiting until the next day means handling food multiple times and increasing contamination risk.

    Let food cool for 20 minutes before sealing containers. Trapping steam creates condensation that makes everything soggy.

    For dishes with crispy elements you want to preserve, store components separately. Keep roasted chickpeas or toasted nuts in a small container and add just before eating.

    Label everything with the date. Most one pan meals last 4 to 5 days refrigerated. Some, like soups and stews, freeze beautifully for up to 3 months.

    Stack containers strategically. Put Monday and Tuesday meals in front. Wednesday through Friday in back. This prevents you from digging through everything daily.

    Reheating Methods That Restore Life

    Microwaving is convenient but often creates uneven heating and texture problems.

    For better results, use your oven or stovetop when possible.

    Oven reheating works best for anything that was originally roasted. Preheat to 350°F, add a tablespoon of water or broth to the container, cover with foil, and heat for 15 to 20 minutes.

    Stovetop reheating excels for braised dishes and anything with sauce. Empty the container into a skillet over medium heat. Add a splash of liquid if it seems dry. Stir occasionally until heated through.

    If you must microwave, use 50% power and heat in 90-second intervals, stirring between each. This prevents the edges from overcooking while the center stays cold.

    Add fresh elements at serving time to boost appeal. A handful of fresh herbs, a squeeze of lemon, or a drizzle of good olive oil makes reheated food taste intentional instead of leftover.

    Common Mistakes That Ruin Meal Prep

    Even experienced cooks make these errors:

    Overcrowding the pan. When vegetables touch, they steam instead of roast. Leave space between pieces for proper browning.

    Using the wrong cuts of meat. Lean proteins dry out during storage and reheating. Choose fattier cuts or add extra moisture through sauce.

    Forgetting acid. A squeeze of lemon or splash of vinegar at the end brightens flavors that dull during storage. Add it fresh, not before storing.

    Cooking everything to completion. Remember that reheating continues the cooking process. Undercook slightly for best results.

    Ignoring carryover cooking. Large pieces of protein continue cooking for 5 to 10 minutes after leaving the oven. Pull them early.

    Recipe Building Blocks You Can Mix and Match

    Once you understand the principles, you can create endless combinations without following specific recipes.

    Choose your base:

    • Rice (white, brown, wild)
    • Quinoa
    • Farro
    • Potatoes
    • Sweet potatoes
    • Cauliflower rice

    Pick your protein:

    • Chicken thighs
    • Chicken breasts
    • Ground turkey
    • Ground beef
    • Pork chops
    • Salmon
    • Shrimp
    • Tofu
    • Chickpeas

    Select vegetables:

    • Broccoli
    • Brussels sprouts
    • Bell peppers
    • Zucchini
    • Carrots
    • Green beans
    • Asparagus
    • Kale

    Add your flavor profile:

    • Italian (tomatoes, garlic, basil, oregano)
    • Mexican (cumin, chili powder, lime, cilantro)
    • Asian (soy sauce, ginger, sesame oil, scallions)
    • Mediterranean (lemon, olive oil, feta, olives)
    • Indian (curry powder, coconut milk, turmeric, garam masala)

    This modular approach means you never get bored. Monday might be teriyaki chicken with broccoli and rice. Wednesday could be cumin-spiced chickpeas with sweet potatoes and peppers.

    Equipment That Makes Everything Easier

    You don’t need specialty tools, but a few key items improve results significantly.

    A heavy-duty sheet pan with raised edges prevents dripping and allows proper air circulation. Half-sheet size (18×13 inches) fits most ovens and holds enough for 4 to 5 meals.

    A large cast iron or stainless steel skillet handles stovetop-to-oven recipes. The 12-inch size accommodates family portions without crowding.

    Silicone baking mats eliminate sticking and make cleanup effortless. They’re reusable and last for years.

    An instant-read thermometer takes the guesswork out of doneness. Chicken thighs should hit 175°F, breasts 165°F, pork 145°F.

    Glass meal prep containers with locking lids prevent leaks and allow oven reheating. The 3-compartment style keeps components separate when needed.

    Scaling Up Without Burning Out

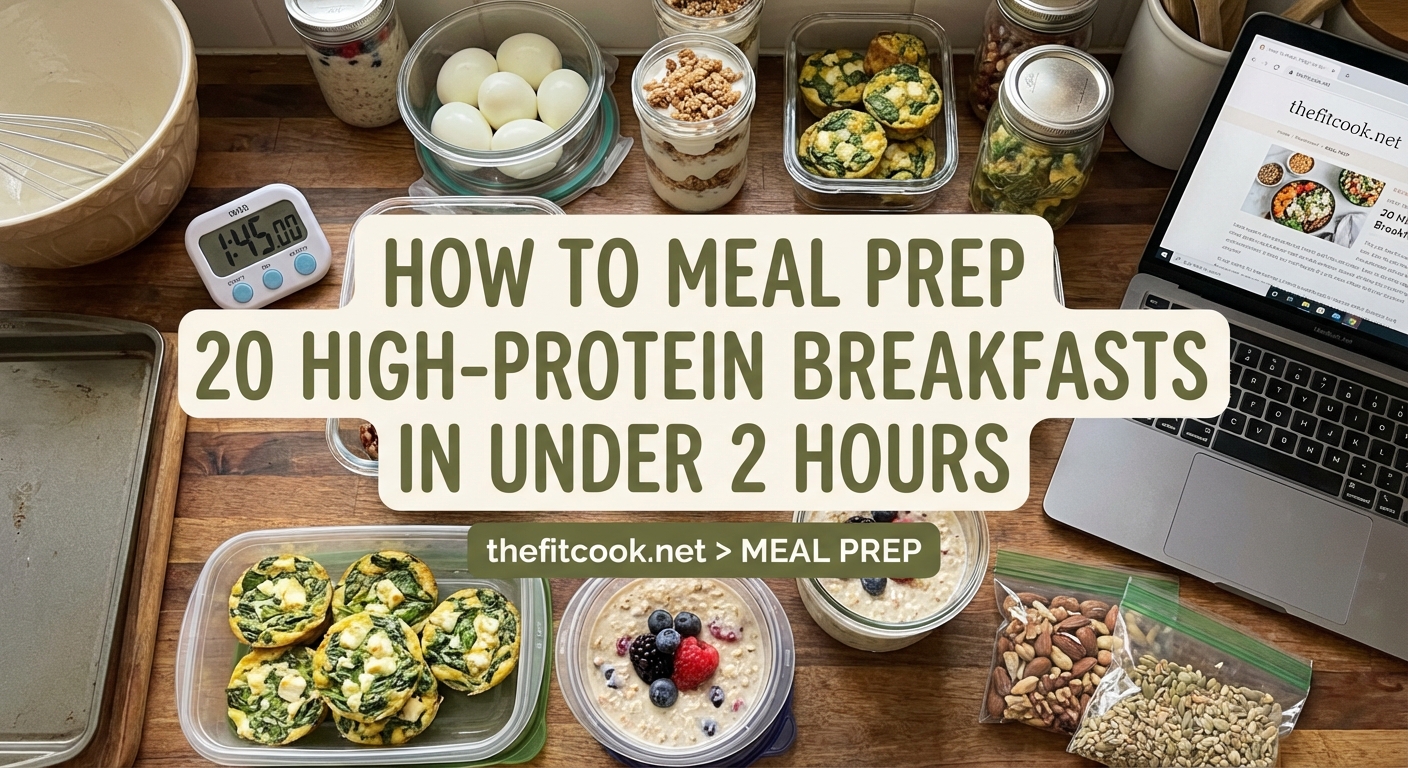
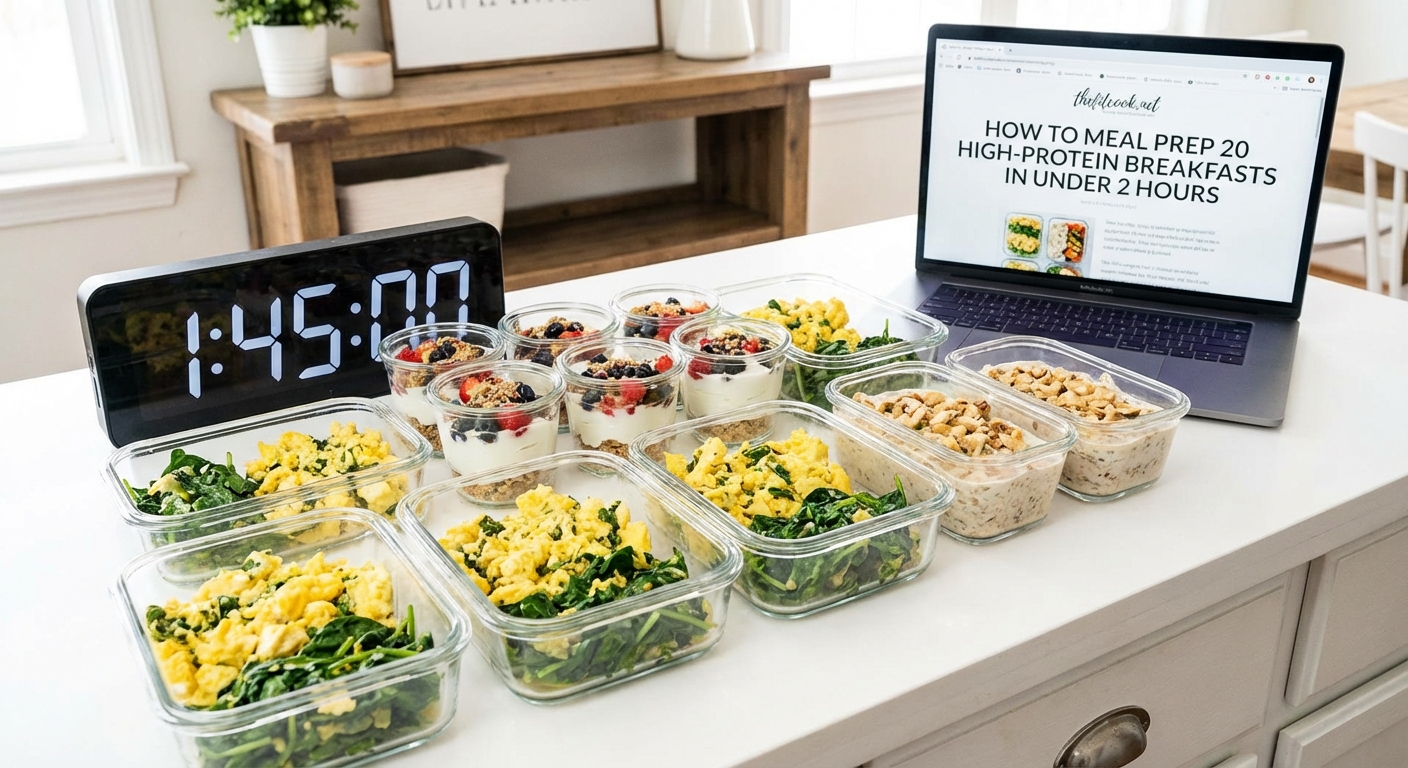
    Prepping for an entire week sounds overwhelming. Break it into manageable steps.

    Sunday afternoon works for most people. Block out 2 to 3 hours when you’re not rushed.

    Prep in stages:

    1. Start the longest-cooking items first (roasted root vegetables, braised proteins)
    2. While those cook, prep faster components (chop vegetables, cook rice)
    3. Assemble and portion everything during the final 20 minutes
    4. Clean as you go to avoid a disaster kitchen

    You don’t need to prep every single meal. Focus on the hardest part of your day. If mornings are chaotic, prep breakfasts. If lunch is your weakness, batch those meals.

    Some people prefer prepping twice weekly. Sunday covers Monday through Wednesday. Wednesday evening handles Thursday and Friday. This keeps food fresher and feels less tedious.

    Making It Work When Life Gets Messy

    Perfect meal prep every week is unrealistic. You’ll have busy Sundays, unexpected dinner invitations, and days when you just want takeout.

    Build flexibility into your system.

    Keep a few backup meals in the freezer. Soups, chili, and curry freeze beautifully and save you when prep doesn’t happen.

    Accept that some weeks you’ll only prep 3 meals instead of 5. That’s still 3 nights you’re not scrambling.

    Use the same flavor profile across multiple meals to reduce mental load. If you’re making Mexican-spiced chicken, use those same seasonings on roasted vegetables and beans. Everything works together if you want to mix and match.

    Involve others if you live with family or roommates. Assign tasks: one person chops vegetables while another seasons proteins. Meal prep becomes social instead of solitary.

    Your Week Gets Easier Starting Now

    One pan meal prep removes the daily decision fatigue of figuring out dinner. You’ve already done the work. Now you just heat and eat.

    The first time takes longer as you figure out your system. By week three, you’ll move through the process efficiently. By week six, it becomes automatic.

    Start with just two or three meals this week. Choose simple combinations you already enjoy. Master the basics before getting fancy with complex recipes.

    Your future self will thank you when Wednesday evening rolls around and dinner is already handled. That’s the real win: reclaiming your time and mental energy for things that matter more than standing over a stove every night.

  • Why Your Meal Prep Goes Bad After 3 Days (And How to Fix It)

    You spent Sunday afternoon cooking five days of healthy meals. By Wednesday, everything smells off or tastes like cardboard. Sound familiar?

    Most meal prep failures have nothing to do with your cooking skills. The problem lies in how food gets stored, what you’re choosing to prep, and when moisture sneaks in where it doesn’t belong.

    Key Takeaway

    Meal prep spoils fast due to moisture buildup, improper cooling, wrong container choices, and selecting ingredients that don’t hold well. Fix it by cooling food completely before sealing, separating wet and dry components, choosing airtight glass containers, and prepping strategically based on ingredient shelf life. These changes extend freshness from three days to seven.

    Your Food Is Still Hot When You Pack It

    Sealing warm food creates condensation inside containers. That moisture becomes a breeding ground for bacteria.

    Steam rises from hot chicken and rice. When it hits the lid, it turns into water droplets that fall back onto your food. This cycle continues until everything gets soggy and bacteria multiply.

    The fix is simple but requires patience. Let cooked food cool on the counter for 30 minutes before refrigerating. For faster cooling, spread food on sheet pans. More surface area means faster heat release.

    Never stack hot containers in the fridge. Cold air can’t circulate around them, and the internal temperature stays in the danger zone (40°F to 140°F) where bacteria thrive.

    You’re Using the Wrong Containers

    Not all meal prep containers are created equal. Cheap plastic containers with loose lids let air in and moisture out.

    Here’s what happens with poor containers:

    • Air exposure oxidizes fats and turns food rancid
    • Moisture escapes, drying out proteins
    • Odors transfer between meals
    • Seals fail after a few washes

    Glass containers with locking lids create true airtight seals. They don’t absorb odors or stains. You can see what’s inside without opening them.

    Invest in containers with separate compartments. This keeps sauces away from crispy elements and prevents cross contamination of flavors.

    Container Type Freshness Duration Best For Avoid For
    Glass with rubber seal 5-7 days Proteins, grains, roasted vegetables Leafy salads
    Plastic with snap lid 3-4 days Snacks, dry ingredients Anything with sauce
    Mason jars 5-6 days Layered salads, overnight oats Hot meals to reheat
    Divided containers 5-7 days Complete meals with sauce Single ingredient storage

    You’re Prepping Ingredients That Don’t Last

    Some foods simply don’t hold up for five days, no matter how well you store them.

    Cooked pasta gets mushy. Cut avocado turns brown. Crispy coating becomes soggy. Leafy greens wilt and release water.

    The smartest meal preppers work with ingredient shelf life, not against it.

    Ingredients that last 5-7 days:
    – Roasted root vegetables (sweet potato, carrots, beets)
    – Cooked chicken breast or thighs
    – Hard boiled eggs
    – Cooked quinoa or rice
    – Roasted broccoli or cauliflower
    – Cooked ground turkey or beef

    Ingredients that fail by day 3:
    – Fresh leafy salads
    – Cut avocado
    – Breaded and fried foods
    – Soft herbs like basil or cilantro
    – Cooked fish (except salmon)
    – Sliced tomatoes

    The best meal prep strategy isn’t cooking everything on Sunday. It’s cooking base ingredients that stay fresh, then adding quick fresh elements throughout the week.

    Moisture Is Destroying Your Meals

    Water is the enemy of meal prep freshness. It creates the perfect environment for bacterial growth and turns textures unappetizing.

    Vegetables release water as they sit. Sauces make everything soggy. Condensation from reheating adds even more moisture.

    Combat this with strategic separation:

    1. Store sauces and dressings in small separate containers
    2. Keep raw vegetables apart from cooked proteins
    3. Place a paper towel under salad greens to absorb excess water
    4. Add crispy toppings only when you’re ready to eat

    For grain bowls, undercook rice or quinoa slightly. It will continue absorbing liquid as it sits and reach perfect texture by day three or four.

    Pat proteins dry before storing. Surface moisture accelerates spoilage.

    Your Fridge Temperature Is Off

    Most home refrigerators run warmer than the ideal 37°F. Even a few degrees makes a huge difference in how long food stays safe.

    Buy a fridge thermometer. They cost less than five dollars and tell you the truth about your storage temperature.

    Food stored at 40°F spoils nearly twice as fast as food at 35°F. That’s the difference between meals lasting three days versus six.

    Place meal prep containers on the middle or bottom shelves. The door and top shelf experience the most temperature fluctuation.

    Don’t overcrowd your fridge. Cold air needs space to circulate around containers. If you’re prepping for the whole week, you might need to clear out other items to make room.

    You’re Reheating Food Incorrectly

    Reheating doesn’t just warm your food. Done wrong, it dries out proteins and makes vegetables mushy.

    Microwaves heat unevenly. The edges get nuclear while the center stays cold. This forces you to overheat everything, destroying texture.

    Better reheating methods:

    1. Remove food from the fridge 10 minutes before reheating
    2. Add a tablespoon of water or broth to the container
    3. Cover loosely to trap steam but allow some venting
    4. Heat at 70% power for longer instead of 100% power briefly
    5. Stir halfway through if possible

    For proteins that dry out easily, reheat to just 165°F. Use a food thermometer. Going hotter doesn’t make food safer, just drier.

    Crispy foods need the oven or air fryer, never the microwave. Reheat at 375°F for 5-8 minutes.

    You’re Batch Cooking Without a Plan

    Cooking everything at once seems efficient. But it often leads to food waste and boredom.

    A smarter approach combines batch cooking with strategic fresh prep:

    Sunday prep:
    – Cook 2-3 pounds of protein
    – Roast a sheet pan of vegetables
    – Make a big batch of grains
    – Prep sauces and dressings

    Mid-week prep (Wednesday):
    – Cook fresh fish or shrimp
    – Chop vegetables for salads
    – Prepare a new sauce for variety

    This two-step method keeps food fresher and adds variety without requiring hours in the kitchen twice.

    The Freezer Is Your Secret Weapon

    Not everything needs to sit in the fridge for five days. Use your freezer strategically.

    Portion half your prepped meals into freezer-safe containers. Pull one out the night before you need it. It thaws in the fridge overnight and tastes fresher than week-old refrigerated food.

    Foods that freeze beautifully:
    – Soups and stews
    – Cooked grains
    – Cooked beans and lentils
    – Most cooked proteins
    – Casseroles and baked dishes

    Foods that don’t freeze well:
    – Lettuce and raw vegetables
    – Cream-based sauces
    – Fried foods
    – Cooked pasta

    Label everything with the date and contents. Frozen meal prep stays good for 2-3 months, but you’ll forget what’s in there after two weeks.

    You’re Ignoring Food Safety Basics

    Food safety isn’t just about avoiding food poisoning. It’s about understanding when food quality declines to the point where it’s not worth eating.

    The USDA says cooked food stays safe for 3-4 days in the fridge. That’s a conservative guideline. With proper storage, many foods last 5-7 days while maintaining good quality.

    Trust your senses:
    – If it smells off, toss it
    – If the texture is slimy, don’t eat it
    – If you see mold, throw out the whole container

    Don’t taste questionable food to test it. Your nose knows before your tongue does.

    When in doubt, freeze it. You can always decide later whether to eat it.

    Making Your Meal Prep Last All Week

    The difference between meal prep that fails by Wednesday and meal prep that stays fresh until Friday comes down to details.

    Cool your food completely. Choose the right containers. Separate wet from dry. Store at the proper temperature. Reheat with care.

    Start with recipes designed for meal prep, not just any recipe scaled up. Some dishes improve over time. Others fall apart.

    Your Sunday effort shouldn’t end up in the trash by Thursday. With these storage strategies, you’ll actually eat what you prep, save money, and stick to your nutrition goals all week long.

  • 5-Day Muscle Building Meal Prep on a Budget: Complete Shopping List Included

    Building muscle doesn’t require a premium grocery budget or expensive supplements. Most people assume you need grass-fed beef and organic everything to see gains, but that’s just not true. The reality is that you can fuel serious muscle growth with simple, affordable ingredients from any grocery store. The difference comes down to smart planning, strategic shopping, and knowing which foods deliver the most protein per dollar.

    Key Takeaway

    Muscle building meal prep on a budget centers on buying affordable protein sources like eggs, chicken thighs, and canned tuna, then pairing them with bulk carbs like rice and oats. Planning five days of meals at once cuts costs by 40% compared to daily cooking. Focus on calories and protein first, then fill gaps with frozen vegetables and seasonal produce for micronutrients without overspending.

    Why Budget Meal Prep Actually Builds More Muscle

    When you’re spending less time worrying about money, you spend more time being consistent. That’s the real advantage of budget meal prep. Consistency beats perfection every single time when it comes to muscle growth.

    Most beginners waste money on fancy ingredients they use once and then throw away. They buy exotic grains, specialty sauces, and premium cuts of meat that sit in the freezer for months. This approach drains your wallet and creates decision fatigue every time you open the fridge.

    Budget meal prep forces simplicity. You work with a core rotation of 8 to 10 ingredients. You eat similar meals throughout the week. This might sound boring, but your muscles don’t care about variety. They care about adequate protein, sufficient calories, and consistent training stimulus.

    The psychological benefit matters too. When you know exactly what you’re eating and how much it costs, you remove anxiety from the equation. You’re not wondering if you can afford to eat enough protein. You’ve already done the math.

    The Real Cost of Building Muscle

    Let’s talk actual numbers. To build muscle effectively, most people need between 0.7 and 1 gram of protein per pound of body weight. For a 180-pound person, that’s 126 to 180 grams daily.

    Here’s what that looks like in real money:

    Protein Source Protein per Dollar Cost for 30g Protein Prep Difficulty
    Whole eggs 24g $0.75 Easy
    Chicken thighs 22g $0.85 Medium
    Canned tuna 28g $0.65 None
    Ground turkey 20g $0.95 Medium
    Greek yogurt 18g $1.10 None
    Whey protein 32g $0.60 None

    Notice that the cheapest options aren’t always the healthiest for every meal, but they get the job done. Canned tuna three times a day isn’t ideal because of mercury concerns, but twice a week is perfectly fine.

    Your total daily protein cost can stay under $4 if you’re strategic. Add another $3 for carbs and fats, and you’re looking at roughly $7 per day for muscle building nutrition. That’s $35 per week, or $140 per month.

    Compare that to eating out even once a day, which easily costs $10 to $15 per meal. The savings add up to hundreds of dollars monthly.

    Five Days of Meals Under $40

    Here’s exactly how to structure a full week of muscle building meals without spending a fortune. This plan assumes you’re cooking for one person and already have basic seasonings at home.

    Shopping List Breakdown

    Proteins:
    – 3 pounds chicken thighs: $6
    – 18 eggs: $3.50
    – 4 cans tuna: $4
    – 2 pounds ground turkey: $7

    Carbohydrates:
    – 5 pounds rice: $4
    – 3 pounds oats: $3
    – 6 sweet potatoes: $4

    Fats and Vegetables:
    – 2 bags frozen mixed vegetables: $3
    – 1 bag frozen broccoli: $1.50
    – Cooking oil and butter: $2
    – 3 bananas: $1

    Total: $39

    This gives you roughly 2,400 to 2,600 calories per day with 160 to 180 grams of protein. Adjust portions based on your size and goals.

    Daily Meal Structure

    1. Breakfast: 3 whole eggs scrambled with frozen vegetables, 1 cup cooked oats with banana
    2. Lunch: 6 ounces chicken thighs with 1.5 cups rice and steamed broccoli
    3. Dinner: 6 ounces ground turkey with sweet potato and mixed vegetables
    4. Snack: 1 can tuna with rice cakes or extra rice

    Cook everything on Sunday evening. Chicken thighs go in the oven at 375°F for 35 minutes. Ground turkey gets browned in a pan with basic seasonings. Rice cooks in a rice cooker or pot. Sweet potatoes bake alongside the chicken.

    The entire process takes about 90 minutes, including cleanup. You’ll have five days of meals ready to grab from the fridge.

    Protein Strategies That Save Money

    Not all protein sources work the same in your budget. Understanding the difference between cost per pound and cost per gram of actual protein changes everything.

    Chicken breast costs more per pound than chicken thighs, but thighs have more fat. You’re paying for calories you might not need. However, thighs stay moist when reheated, which matters for meal prep. Dry, overcooked chicken breast is miserable to eat on day four.

    Here’s the hierarchy of budget proteins:

    • Eggs: Versatile, easy to prep multiple ways, complete amino acid profile
    • Canned fish: Zero prep time, shelf stable, high protein density
    • Chicken leg quarters: Cheaper than thighs, just requires removing skin if cutting fat
    • Ground turkey: Lean, affordable when on sale, works in many recipes
    • Cottage cheese: High protein, no cooking required, pairs with sweet or savory foods

    Avoid pre-marinated meats, pre-cut vegetables, and anything in small packages. You’re paying for convenience that takes 30 seconds to do yourself.

    Buy the largest package available if it’s something you’ll actually use. A 10-pound bag of chicken thighs costs less per pound than buying 2 pounds at a time. Freeze what you won’t use within three days.

    “The biggest mistake I see people make is buying protein they don’t actually enjoy eating. You can save $20 per week buying the cheapest option, but if you hate it and end up ordering takeout by Wednesday, you’ve wasted money and sabotaged your progress. Find affordable proteins you genuinely like, even if they cost 50 cents more per pound.” – Registered Dietitian specializing in sports nutrition

    Carbs and Fats Without the Premium Price

    Carbohydrates fuel your training. Fats support hormone production. Both are essential for muscle growth, and both can be incredibly cheap.

    Best Budget Carbs:
    – White rice (not inferior to brown for muscle building)
    – Oats (buy the cylinder containers, not individual packets)
    – Regular pasta (whole wheat costs more with minimal benefit)
    – White potatoes (sweet potatoes have more nutrients but regular potatoes work fine)
    – Bread (store brand whole wheat is perfectly adequate)

    Best Budget Fats:
    – Whole eggs (the yolk contains most of the nutrients)
    – Cooking oils (vegetable, canola, or olive on sale)
    – Peanut butter (natural versions cost more without major benefits)
    – Butter (real butter, not margarine)
    – Cheese (blocks cost less than shredded)

    Avoid trendy carbs like quinoa, farro, or specialty ancient grains. They’re nutritious but not necessary. Rice and oats have fueled millions of successful muscle building journeys.

    The same goes for exotic oils. Coconut oil and avocado oil are fine, but regular olive oil or even vegetable oil works perfectly well for cooking. Save the premium stuff for when you’re not on a tight budget.

    Meal Prep Mistakes That Waste Money

    Even with the right ingredients, poor execution kills your budget. Here are the most common errors:

    Making too much variety: Trying to prep seven different meals leads to buying ingredients you’ll use once. Stick to three main dishes repeated throughout the week.

    Ignoring sales cycles: Meat goes on sale in predictable patterns. Stock up when chicken drops to $1.99 per pound instead of paying $4.99 the next week.

    Throwing away leftovers: That half cup of rice or remaining vegetables can become tomorrow’s lunch. Nothing is too small to save.

    Buying pre-seasoned anything: You’re paying triple for someone to add salt and pepper. Buy plain proteins and season them yourself.

    Not using your freezer: Frozen vegetables are often cheaper and more nutritious than fresh ones that have been sitting in the produce section for days. Frozen chicken and fish work perfectly well for meal prep.

    Skipping breakfast prep: Scrambling eggs every morning wastes time. Make egg muffins or overnight oats in batches.

    The biggest waste happens when people quit meal prep entirely because they got bored or overwhelmed. Start with just lunch prep if doing all meals feels like too much. Build the habit before expanding.

    Adjusting Calories Without Breaking Budget

    Maybe you need more calories to gain weight. Maybe you need fewer to cut fat while maintaining muscle. Either way, you can adjust without spending significantly more.

    To increase calories cheaply:
    – Add more rice or oats to existing meals
    – Include peanut butter with snacks
    – Cook with more oil or butter
    – Drink whole milk instead of water with meals
    – Add an extra egg to breakfast

    To decrease calories while keeping protein:
    – Reduce rice portions by half
    – Switch to egg whites for some meals (though whole eggs are more satisfying)
    – Use cooking spray instead of oil
    – Replace one carb meal with extra vegetables
    – Choose leaner proteins like chicken breast when on sale

    The foundation stays the same. You’re just tweaking portions of the cheapest ingredients, which are your carbs and fats.

    Smart Shopping Habits That Compound

    Small changes in how you shop create massive savings over time. These habits take almost no extra effort but save hundreds annually.

    Shop discount grocery stores first: Aldi, Lidl, and similar chains offer 30% to 40% lower prices on basics. The quality is identical for items like rice, oats, eggs, and frozen vegetables.

    Buy store brands exclusively: National brands spend millions on advertising. You’re paying for that in the price. Store brand chicken is the same chicken.

    Check unit prices: A 3-pound bag might cost more total than a 1-pound bag, but less per pound. Always compare the unit price on the shelf tag.

    Know your prices: Keep a note in your phone with what you normally pay for chicken, eggs, and rice. When you see a better price, buy extra.

    Avoid middle aisles: The perimeter of the store has basic ingredients. The middle aisles have processed foods with massive markups.

    Never shop hungry: You’ll buy impulsively and waste money on things that don’t fit your meal plan.

    Use cash back apps: Ibotta and similar apps give you money back on groceries you’re already buying. It’s small amounts but adds up.

    Keeping Meals Interesting on Repeat

    Eating similar foods daily doesn’t mean eating identical meals. Small variations prevent burnout without adding cost.

    Seasoning rotation:
    – Monday: Italian herbs and garlic
    – Tuesday: Taco seasoning
    – Wednesday: Teriyaki sauce (make your own with soy sauce and sugar)
    – Thursday: Lemon pepper
    – Friday: BBQ sauce

    All of these cost under $3 per container and last for months. They completely change how a meal tastes.

    Texture changes:
    – Grill chicken one week, bake it the next, slow cook it the third week
    – Mash sweet potatoes instead of roasting them
    – Fry rice instead of steaming it
    – Make oats into pancakes occasionally

    Strategic condiments:
    – Hot sauce (adds zero calories, maximum flavor)
    – Mustard (nearly zero calories, works on everything)
    – Salsa (cheap, low calorie, versatile)
    – Vinegar (changes acidity and brightness)

    You’re not adding expensive ingredients. You’re using what you have in different combinations.

    When to Spend More

    Budget meal prep doesn’t mean never spending money on quality. Some upgrades are worth it.

    Invest in these:
    – Good food storage containers (they last years and prevent waste)
    – A rice cooker (saves time and makes perfect rice every time)
    – A meat thermometer (prevents overcooking expensive protein)
    – Quality knives (faster prep, less frustration)

    Don’t waste money on:
    – Meal prep services (you’re paying someone to do what takes 90 minutes)
    – Organic everything (conventional produce is safe and nutritious)
    – Grass-fed beef (not necessary for muscle building)
    – Specialty supplements (food first, supplements only for gaps)
    – Trendy superfoods (marketing hype, not essential)

    The 80/20 rule applies. Get 80% of your results from basic, cheap ingredients. The remaining 20% can include occasional upgrades when they’re on sale or you have extra money.

    Making It Work Long Term

    The real test isn’t surviving one week of meal prep. It’s maintaining this approach for months while continuing to build muscle.

    Set up systems that reduce decision making. Eat the same breakfast every day for a month. Rotate between two lunch options. Keep dinner simple with a protein, carb, and vegetable.

    Track your progress with measurements and strength gains, not just the scale. If you’re getting stronger and your clothes fit better, your budget meal prep is working.

    Plan for occasional breaks. Once every two weeks, eat a meal out or order something different. This keeps you sane and prevents the feeling of deprivation that leads to quitting.

    Connect with others doing the same thing. Online communities focused on budget fitness can provide new recipe ideas and motivation when you’re tired of the same meals.

    Remember that this phase is temporary. As you advance in your career and earn more, you’ll have more flexibility. But the habits you build now, the discipline of planning and preparing food, will serve you forever. Many successful people who can afford any food they want still meal prep because they’ve learned how effective it is.

    Your Muscle Building Budget Starts Now

    You have everything you need to start building muscle without financial stress. The grocery list costs under $40 for five days. The meals provide adequate protein and calories. The system is simple enough to maintain long term.

    Start this Sunday. Set aside 90 minutes. Buy the ingredients listed earlier in this article. Cook your proteins, prepare your carbs, portion everything into containers. By Sunday evening, your entire week is handled.

    Your wallet will thank you. Your muscles will grow. And you’ll prove that building a strong physique doesn’t require a trust fund, just smart planning and consistent execution.

  • The Ultimate Macro-Friendly Freezer Meal Prep Guide for Beginners

    Tracking macros keeps your nutrition on point, but cooking every single meal from scratch can drain your energy and time. Freezer meal prep solves this problem by letting you cook once and eat multiple times without sacrificing your protein, carb, or fat targets. You can batch cook on Sunday, freeze portioned meals, and pull them out whenever you need a balanced plate ready in minutes.

    Key Takeaway

    Macro friendly freezer meal prep helps you batch cook balanced meals, portion them accurately, and freeze them for later use. This method saves time during busy weeks, prevents last-minute takeout, and keeps your nutrition goals on track. With proper containers, labeling, and reheating techniques, you can enjoy fresh-tasting meals that match your exact macro targets without daily cooking.

    Why Freezer Meal Prep Works for Macro Tracking

    Most people who track macros spend hours each week cooking individual meals. That approach works until life gets busy. A packed work schedule, evening workouts, or family obligations make it hard to cook every night.

    Freezer meal prep flips the script. You dedicate a few hours one day to cook multiple meals, then store them in the freezer. Each meal gets portioned according to your macro targets, so you always know exactly what you’re eating.

    This method also reduces food waste. When you buy ingredients in bulk and prep everything at once, nothing sits in the fridge until it spoils. You use what you buy, and every meal has a purpose.

    What Makes a Meal Freezer Friendly

    Not every recipe freezes well. Some ingredients lose texture or flavor after thawing. Others become watery or mushy.

    The best freezer meals include these components:

    • Lean proteins like chicken breast, ground turkey, or white fish
    • Complex carbs such as rice, quinoa, or sweet potatoes
    • Vegetables that hold up well, including broccoli, bell peppers, and green beans
    • Minimal dairy or cream-based sauces that can separate when frozen

    Avoid meals with high water content vegetables like lettuce, cucumber, or raw tomatoes. These turn soggy after freezing. Also skip recipes with crispy coatings or fried elements, as they lose their crunch.

    Casseroles, stir fries, and bowl-style meals freeze beautifully. So do marinated proteins, cooked grains, and roasted vegetables when stored separately.

    How to Calculate Macros Before You Prep

    Accurate macro tracking starts before you cook. You need to know the exact amounts of protein, carbs, and fats in each meal.

    1. Choose your recipes and list every ingredient with its weight in grams.
    2. Use a nutrition tracking app to calculate the total macros for the entire batch.
    3. Divide the total by the number of portions you plan to make.
    4. Adjust ingredient amounts if the macros don’t match your targets.

    For example, if your batch of chicken and rice totals 150g protein, 300g carbs, and 50g fat across six meals, each portion contains 25g protein, 50g carbs, and 8g fat. If you need more protein, add extra chicken. If carbs are too high, reduce the rice.

    Weigh everything raw before cooking. Cooked weights vary based on water loss, which makes raw measurements more reliable.

    Essential Tools for Macro Friendly Freezer Prep

    The right equipment makes freezer meal prep faster and more accurate. You don’t need fancy gadgets, but a few key items help.

    A digital food scale is non-negotiable. Eyeballing portions throws off your macros. Weighing each container ensures consistency.

    Airtight containers prevent freezer burn and keep meals fresh. Glass containers work well but take up more space. BPA-free plastic containers stack easily and weigh less.

    Freezer bags save space and work great for marinated proteins or soups. Squeeze out all the air before sealing to maintain quality.

    Labels and a permanent marker help you track what’s inside each container and when you made it. Include the meal name, date, and macros on every label.

    A slow cooker or Instant Pot speeds up batch cooking. You can cook large amounts of protein or grains without constant monitoring.

    Step by Step Freezer Meal Prep Process

    Start by choosing four to six recipes that freeze well and fit your macro targets. Pick meals with overlapping ingredients to simplify shopping.

    Create a detailed grocery list organized by store section. Buy everything in one trip to save time.

    Set aside three to four hours for prep and cooking. Clear your kitchen counters and lay out all your tools.

    1. Wash and chop all vegetables first.
    2. Cook proteins in batches using your oven, stovetop, or slow cooker.
    3. Prepare grains and starches while proteins cook.
    4. Assemble meals in containers, weighing each portion as you go.
    5. Let everything cool to room temperature before sealing.
    6. Label each container with the meal name, date, and macros.
    7. Freeze meals in a single layer until solid, then stack them to save space.

    Cooling meals before freezing prevents condensation, which causes ice crystals and freezer burn. Patience here pays off in meal quality later.

    Best Foods to Freeze for Balanced Macros

    Some ingredients freeze better than others. Focus on these staples for consistent results.

    Proteins:
    – Chicken breast (grilled, baked, or shredded)
    – Ground turkey or lean beef
    – White fish fillets
    – Tofu (pressed and cooked)
    – Egg muffins or frittatas

    Carbs:
    – Brown rice
    – Quinoa
    – Sweet potatoes (cubed or mashed)
    – Whole wheat pasta (slightly undercooked)
    – Oats (in baked goods or overnight oat portions)

    Fats:
    – Avocado (frozen in portions for smoothies)
    – Nuts and seeds (in measured amounts)
    – Olive oil (used in cooking before freezing)

    Vegetables:
    – Broccoli
    – Cauliflower
    – Bell peppers
    – Spinach (cooked)
    – Green beans
    – Zucchini (cooked, not raw)

    Food Type Freezes Well Avoid Freezing
    Proteins Cooked chicken, ground meats, fish Fried or breaded items
    Carbs Rice, quinoa, sweet potatoes Pasta salads, raw potatoes
    Vegetables Cooked broccoli, peppers, spinach Lettuce, cucumbers, raw tomatoes
    Dairy Hard cheeses, butter Sour cream, yogurt, cream cheese

    How to Portion Meals for Accurate Tracking

    Portioning determines whether your meal prep succeeds or fails. Inconsistent portions mean inconsistent macros.

    Use your food scale to weigh each component separately. Place your container on the scale, zero it out, then add your protein. Zero again, add your carbs. Repeat for fats and vegetables.

    This method gives you precise control. If you need 6 ounces of chicken, 150 grams of rice, and 100 grams of broccoli, you’ll hit those numbers exactly.

    For mixed dishes like casseroles or chili, calculate the total macros for the entire batch, then divide by the number of portions. Weigh the full dish, divide that weight by your portion count, and scoop out equal amounts.

    Store each portion in its own container. Avoid freezing large batches that require portioning after thawing, as this adds extra work and reduces accuracy.

    Preventing Freezer Burn and Maintaining Quality

    Freezer burn happens when air reaches your food. It creates dry, discolored spots that taste off.

    Prevent it by removing as much air as possible from containers and bags. Press plastic wrap directly onto the surface of soups or sauces before sealing the lid.

    Leave a small amount of headspace in containers with liquids, as they expand when frozen. Too much liquid in a sealed container can crack the lid or container.

    Store meals at 0°F or below. Fluctuating temperatures cause ice crystals and degrade quality.

    Use meals within three months for best taste and texture. While frozen food stays safe indefinitely at proper temperatures, quality declines over time.

    “Proper storage makes the difference between a meal that tastes fresh and one that tastes like the freezer. Invest in quality containers and take an extra minute to remove air. Your future self will thank you.”

    Reheating Without Ruining Your Macros

    Reheating frozen meals correctly preserves both flavor and nutrition. Poor reheating methods can dry out proteins or make vegetables mushy.

    Thaw meals in the refrigerator overnight for best results. This gentle method maintains texture better than microwave defrosting.

    For microwave reheating, use 50% power and stir halfway through. High heat creates hot spots and overcooks edges while leaving the center cold.

    Oven reheating works well for casseroles and baked dishes. Cover with foil to prevent drying, and heat at 350°F until warmed through.

    Stovetop reheating suits stir fries and skillet meals. Add a splash of water or broth to prevent sticking.

    Avoid reheating the same meal multiple times. Repeated temperature changes increase bacterial growth and degrade quality.

    Common Freezer Meal Prep Mistakes to Avoid

    Even experienced meal preppers make errors that waste time or ruin meals. Avoid these common pitfalls.

    Overfilling containers leaves no room for expansion. Liquids need space to freeze without cracking the container.

    Freezing warm food raises the freezer temperature and affects other stored items. Always cool meals to room temperature first.

    Skipping labels creates mystery meals. You won’t remember what’s in each container or when you made it.

    Using the wrong containers leads to freezer burn or broken lids. Invest in containers designed for freezing.

    Cooking pasta fully before freezing makes it mushy when reheated. Undercook by two minutes, then finish cooking when you reheat.

    Ignoring portion sizes defeats the purpose of macro tracking. Weigh everything for accuracy.

    Mistake Why It Matters How to Fix It
    Overfilling containers Causes leaks and broken lids Leave 1 inch headspace for liquids
    Freezing hot food Raises freezer temp, affects other food Cool to room temperature first
    No labels Can’t identify meals or track age Label with name, date, and macros
    Wrong containers Causes freezer burn Use airtight, freezer-safe containers

    Sample Meal Prep Day Schedule

    Planning your prep day prevents chaos and keeps you on track. Here’s a sample timeline for preparing six different meals with four portions each.

    9:00 AM: Review recipes and lay out all ingredients and tools.

    9:30 AM: Start cooking proteins in the oven and slow cooker.

    10:00 AM: While proteins cook, wash and chop all vegetables.

    10:30 AM: Cook rice, quinoa, or other grains.

    11:00 AM: Sauté vegetables and prepare any sauces.

    11:30 AM: Begin assembling meals in containers, weighing each portion.

    12:30 PM: Label all containers with meal names, dates, and macros.

    1:00 PM: Let meals cool while you clean up.

    2:00 PM: Transfer cooled meals to the freezer.

    This schedule assumes moderate cooking skills and efficient multitasking. Adjust timing based on your experience level and chosen recipes.

    Adapting Recipes for Freezer Storage

    Most recipes can be modified to freeze better. Small adjustments make a big difference in post-thaw quality.

    Reduce liquid by 25% in soups and stews. Freezing and thawing releases moisture from vegetables, which dilutes the dish.

    Undercook vegetables slightly. They’ll finish cooking when you reheat, preventing mushiness.

    Add fresh herbs and delicate seasonings after reheating. Freezing dulls their flavor.

    Use less salt than normal. Saltiness intensifies during freezing, so start conservative and adjust when serving.

    Skip crispy toppings until serving time. Add breadcrumbs, fried onions, or crushed chips after reheating.

    For casseroles, assemble but don’t bake. Freeze unbaked, then bake from frozen when ready to eat. This preserves texture better than baking twice.

    Building a Rotation That Prevents Boredom

    Eating the same meals every week gets old fast. Create variety without extra work by building a rotation system.

    Choose 12 to 15 recipes that fit your macros and freeze well. Prep four different meals each week, making multiple portions of each.

    Rotate through your recipe list so you’re not eating the same thing more than once every three weeks. This keeps meals interesting without requiring constant recipe hunting.

    Mix up your protein sources. Don’t prep all chicken meals. Include turkey, fish, and plant-based options.

    Vary your cooking methods. If you grill chicken one week, try baking or slow cooking it the next.

    Change your flavor profiles. Rotate between Asian-inspired, Mexican, Italian, and Mediterranean themes.

    Keep a running list of meals you’ve prepped and their dates. This helps you track what’s in your freezer and plan future prep sessions.

    Scaling Up or Down Based on Your Needs

    Not everyone needs the same number of meals. Scale your prep based on your lifestyle.

    If you eat out for lunch but want prepped dinners, make seven portions per recipe instead of 14.

    Solo meal preppers can make smaller batches or freeze individual components to mix and match later.

    Families need larger quantities but can use the same process. Just multiply ingredient amounts and portion sizes.

    Athletes with higher calorie needs should increase portion sizes while maintaining macro ratios. Weigh larger amounts of each component but keep the proportions consistent.

    People cutting weight can prep smaller portions with the same macro balance. The process stays the same, just with less food per container.

    Your Freezer Is Your Macro Tracking Secret Weapon

    Freezer meal prep transforms macro tracking from a daily chore into a manageable weekly task. You cook once, portion accurately, and have balanced meals ready whenever you need them. No more scrambling to hit your numbers at the end of the day or settling for subpar takeout because you’re too tired to cook. With proper planning, quality containers, and smart reheating methods, your freezer becomes a reliable tool that supports your fitness goals without taking over your life. Start with one prep day this week and see how much time and stress it saves.

  • How to Meal Prep 20 High-Protein Breakfasts in Under 2 Hours

    How to Meal Prep 20 High-Protein Breakfasts in Under 2 Hours

    Mornings are chaos. Alarms blare, coffee spills, and breakfast becomes whatever you can grab on your way out the door. But skipping protein at breakfast means you’ll crash by 10 AM, reaching for vending machine snacks that derail your entire day. The solution isn’t waking up earlier or buying expensive meal delivery services. It’s spending two hours on Sunday prepping breakfasts that actually taste good and keep you full until lunch.

    Key Takeaway

    High protein breakfast meal prep saves time and supports your fitness goals. By dedicating two hours to batch cooking, you can prepare 20 servings of protein-rich breakfasts using efficient techniques like sheet pan baking, muffin tin cooking, and mason jar assembly. Focus on recipes with 20-30 grams of protein per serving that reheat well and store safely for 4-5 days.

    Why Protein at Breakfast Changes Everything

    Your body spent the night fasting. When you wake up, muscle protein synthesis is low and cortisol is high. Eating 25-30 grams of protein within an hour of waking triggers muscle building, stabilizes blood sugar, and reduces cravings throughout the day.

    Most grab-and-go options fail this test. A bagel with cream cheese? Maybe 8 grams. A banana and coffee? Zero. Even Greek yogurt cups usually max out around 15 grams, leaving you hungry before your first meeting ends.

    Meal prepping solves this by frontloading your effort. Instead of cooking 20 separate breakfasts, you cook once and eat for two weeks. The time savings are massive. The nutrition stays consistent. And you stop making bad choices when you’re tired and hungry.

    The Core Strategy for Two Hour Meal Prep

    How to Meal Prep 20 High-Protein Breakfasts in Under 2 Hours - Illustration 1

    Efficiency comes from using your oven, stovetop, and counter space simultaneously. While egg muffins bake, you can cook sausage on the stove and assemble overnight oats on the counter. This parallel processing turns what could be six hours of work into two.

    Here’s how to structure your prep session:

    1. Start with recipes that take longest to cook (casseroles, baked oatmeal).
    2. While those bake, prep ingredients for stovetop items (scrambles, hash).
    3. Use the final 30 minutes for no-cook assembly (overnight oats, chia pudding, yogurt bowls).
    4. Cool everything completely before portioning into containers.
    5. Label each container with the date and reheating instructions.

    This approach keeps you moving without overwhelming your kitchen. You’re never waiting around for one thing to finish before starting the next.

    Best High Protein Ingredients for Meal Prep

    Not all protein sources survive five days in the fridge equally well. Some get rubbery. Others develop off flavors. Focus on ingredients that hold up under refrigeration and reheating.

    Top protein sources for meal prep:

    • Eggs (whole or egg whites)
    • Cottage cheese
    • Greek yogurt (full fat holds texture better)
    • Chicken sausage
    • Ground turkey
    • Smoked salmon
    • Protein powder (whey or plant-based)
    • Black beans
    • Tofu (extra firm only)
    • Cheese (cheddar, feta, mozzarella)

    Eggs are your MVP. They’re cheap, versatile, and pack 6 grams of protein each. A three-egg breakfast gives you 18 grams before you add cheese, meat, or beans. Baking eggs in muffin tins or casserole dishes makes portioning automatic.

    Cottage cheese is underrated. A half cup contains 14 grams of protein. Mix it into egg bakes for extra creaminess or blend it into smoothie prep bags. It stabilizes the texture of baked goods and keeps them moist through the week.

    Five Recipes That Hit 25+ Grams Per Serving

    How to Meal Prep 20 High-Protein Breakfasts in Under 2 Hours - Illustration 2

    These recipes form the backbone of any successful high protein breakfast meal prep. Each one scales easily, reheats well, and delivers serious nutrition.

    Sausage and Pepper Egg Muffins

    Cook one pound of chicken sausage with diced bell peppers and onions. Whisk 12 eggs with a half cup of cottage cheese. Divide the sausage mixture into a greased 12-cup muffin tin, pour egg mixture over top, and bake at 350°F for 22 minutes. Each muffin delivers 16 grams of protein. Make two batches for 24 servings.

    Sheet Pan Breakfast Burritos

    Scramble 18 eggs on a sheet pan with black beans, diced ham, and shredded cheese. Bake at 375°F for 15 minutes, stirring halfway. Portion onto whole wheat tortillas, roll tight, and wrap in foil. Each burrito contains 28 grams of protein. Reheat in the oven or microwave without the foil.

    Protein-Packed Baked Oatmeal

    Mix 3 cups of oats with 2 scoops of vanilla protein powder, 4 eggs, 2 cups of milk, and a mashed banana. Pour into a 9×13 pan and bake at 350°F for 35 minutes. Cut into 8 squares. Each square has 22 grams of protein and reheats in 60 seconds.

    Greek Yogurt Parfait Jars

    Layer full-fat Greek yogurt with homemade granola and berries in mason jars. Use 1.5 cups of yogurt per jar (35 grams of protein). Keep granola separate until eating to maintain crunch. These last 5 days and require zero reheating.

    Cottage Cheese Pancake Batch

    Blend 2 cups of cottage cheese with 6 eggs, 1 cup of oats, and cinnamon. Cook on a griddle like regular pancakes. Stack with parchment between each pancake and freeze. Three pancakes provide 30 grams of protein. Reheat in the toaster.

    Storage and Reheating Without Ruining Texture

    Even perfect recipes fail if you store them wrong. Moisture is the enemy. Condensation makes everything soggy and creates bacterial growth. Always let food cool completely before sealing containers. Hot food in a closed container creates steam that turns crispy edges into mush.

    Use glass containers with tight-sealing lids for anything with sauce or cheese. Plastic is fine for dry items like pancakes or muffins. Keep a roll of parchment paper handy to separate stacked items.

    “The biggest mistake people make is reheating everything on high power. Use 50% power for twice as long. Your eggs stay fluffy and your casseroles heat evenly without rubber edges.” – Professional meal prep coach

    For best results, reheat egg dishes covered with a damp paper towel. The moisture prevents drying without making things soggy. Burritos reheat best wrapped in a damp paper towel for 90 seconds, then unwrapped for another 30 seconds to crisp the tortilla.

    Common Meal Prep Mistakes and How to Avoid Them

    Mistake Why It Happens The Fix
    Rubbery eggs Overcooking or reheating too hot Undercook slightly, reheat at 50% power
    Soggy containers Sealing while hot Cool 30 minutes before lidding
    Bland food Underseasoning for batch cooking Season more than you think you need
    Freezer burn Poor wrapping Double wrap in plastic, then foil
    Food waste Making too much variety Stick to 3-4 recipes you actually like

    The variety trap catches everyone. You see 20 different recipes and want to try them all. Then you end up with two servings of 10 different things, half of which you don’t actually enjoy. Better to make larger batches of fewer recipes you know you’ll eat.

    Seasoning for meal prep requires a heavier hand than cooking to eat immediately. Flavors mellow in the fridge. Salt, pepper, garlic, and herbs all need to be bumped up by about 25% to taste right after storage.

    Building Your Two Week Rotation

    Variety matters for adherence. Eating the same breakfast seven days straight leads to burnout by Thursday. A two-week rotation with four core recipes gives you enough variety without overwhelming your prep time.

    Week one lineup:

    1. Monday and Thursday: Sausage egg muffins
    2. Tuesday and Friday: Breakfast burritos
    3. Wednesday: Greek yogurt parfait
    4. Weekend: Baked oatmeal or pancakes

    Week two lineup:

    1. Monday and Thursday: Cottage cheese egg bake
    2. Tuesday and Friday: Protein pancakes
    3. Wednesday: Smoothie prep bags
    4. Weekend: Breakfast casserole

    This rotation keeps your taste buds interested while maintaining the efficiency of batch cooking. You’re only making 2-3 items per prep session, which fits comfortably into two hours.

    Scaling Recipes Up Without Breaking Your Budget

    Buying in bulk saves money, but only if you use everything before it spoils. Eggs keep for 5 weeks. Frozen vegetables last months. Cheese freezes well if you shred it first. Plan your shopping around these realities.

    A typical two-week meal prep costs between $40 and $60 for one person, depending on your protein choices. That’s $2-3 per breakfast. Compare that to a $8 drive-through sandwich or a $12 smoothie bowl, and you’re saving $80-140 every two weeks.

    Buy store-brand staples. Generic eggs, oats, and cottage cheese are identical to name brands. Spend your money on quality protein like organic chicken sausage or wild-caught salmon. The base ingredients don’t need to be fancy.

    Costco, Sam’s Club, and restaurant supply stores sell eggs by the flat (15 dozen) and cheese in 5-pound blocks. If you have the space and plan to prep consistently, these bulk purchases pay for themselves in three prep sessions.

    Equipment That Makes Prep Actually Possible

    You don’t need a $400 stand mixer or a commercial oven. But a few key tools make the difference between a smooth two-hour session and a frustrating four-hour ordeal.

    Essential tools:

    • Two 12-cup muffin tins (for parallel baking)
    • One large sheet pan (18×26 inch)
    • Glass meal prep containers (at least 20)
    • Immersion blender (for smoothie bags and cottage cheese blending)
    • Kitchen scale (for consistent portions)
    • Parchment paper (prevents sticking and makes cleanup easy)

    The immersion blender deserves special mention. It turns cottage cheese into a smooth, creamy base for pancakes or egg bakes in 30 seconds. No food processor needed. Just blend it right in the measuring cup.

    A kitchen scale eliminates guesswork. Eyeballing portions means some servings have 15 grams of protein while others have 30. Weighing ensures consistency. Once you know what 4 ounces of scrambled eggs looks like in your container, you can eyeball it going forward.

    Making It Work When Life Gets Complicated

    Travel, illness, schedule changes, and unexpected events will disrupt your routine. Build flexibility into your system instead of treating meal prep as all or nothing.

    Keep a backup stash of frozen breakfast burritos. When you can’t prep, you still have something ready. Frozen items last three months and reheat in five minutes.

    Prep on different days if Sunday doesn’t work. Tuesday evening or Saturday morning both work fine. The day matters less than the consistency.

    Cut your batch in half if you’re short on time. Ten servings are better than zero. You can always supplement with simpler options like Greek yogurt with nuts on the days you run out.

    Partner prep sessions work well for couples or roommates. Split the recipes, share the work, and divide the results. One person handles egg dishes while the other does oatmeal and parfaits. You’re done in 90 minutes instead of two hours.

    Your Next Two Hours

    The hardest part is starting. Your first prep session will take longer than two hours because you’re learning the rhythm. That’s normal. By your third session, you’ll move through the steps without thinking.

    Pick four recipes from this guide. Write your shopping list. Block two hours on your calendar this weekend. Set up your workspace with all the tools you need before you start cooking.

    When Sunday evening arrives and you’re pulling a perfectly portioned breakfast from the fridge instead of skipping the meal entirely, you’ll understand why people who meal prep rarely go back to winging it. The time you invest now buys you calm, energized mornings for the next two weeks. That’s a trade worth making.